

Reading Paul Dye’s recent article on adding a blister to your cowl to deal with part of the exhaust wanting to occupy some of the cowl’s space brought back memories of when I had a similar issue. After the first few flights of my homebuilt, I noticed that while there was no direct contact between the exhaust and the cowl, the close proximity in two places was enough to begin damaging the cowl and allow substantial heat to reach its outer surface. While minimal, there was some space between the exhaust and the cowl in the affected areas, leading to an insulation approach rather than adding blisters. The challenge was to find insulation that would be adequate given the exceptional temperatures and the close proximity of the exhaust, which was about half an inch. While the auto racing world often wraps the exhaust with insulation, this approach is generally considered to have a negative impact on exhaust system longevity.

The key to the solution that has successfully kept the heat from my exhaust at bay for more than 27 years is a space-age insulation material I discovered in my former career. It’s called aerogel. It’s a class of synthetic, ultralight, porous materials typically derived from a gel in which the liquid component has been replaced with gas, typically air or carbon dioxide. It is extremely light and has remarkably low thermal conductivity. A very thin layer can protect against extreme temperatures. Layers as thin as a quarter-inch can sustain thermal gradients up to 1,000° F. Available in a variety of forms, these mats commonly come in various thicknesses, such as 5 mm or 10 mm. The actual insulating material is composed of gas trapped in a nanoporous silica structure, or ultra-thin glass or silica microspheres, while the mat may be a fiberglass matrix infused with the microspheres.
Figure 1 shows a typical mat material—in this case, Pyrogel, from one of the original companies in the field. The 5 mm version (Aspen Aerogels Pyrogel XTE) is what I used, though there are now numerous sources, including simply searching for aerogel on Amazon. Now, let’s look at the elements of turning this into a practical, applied solution.

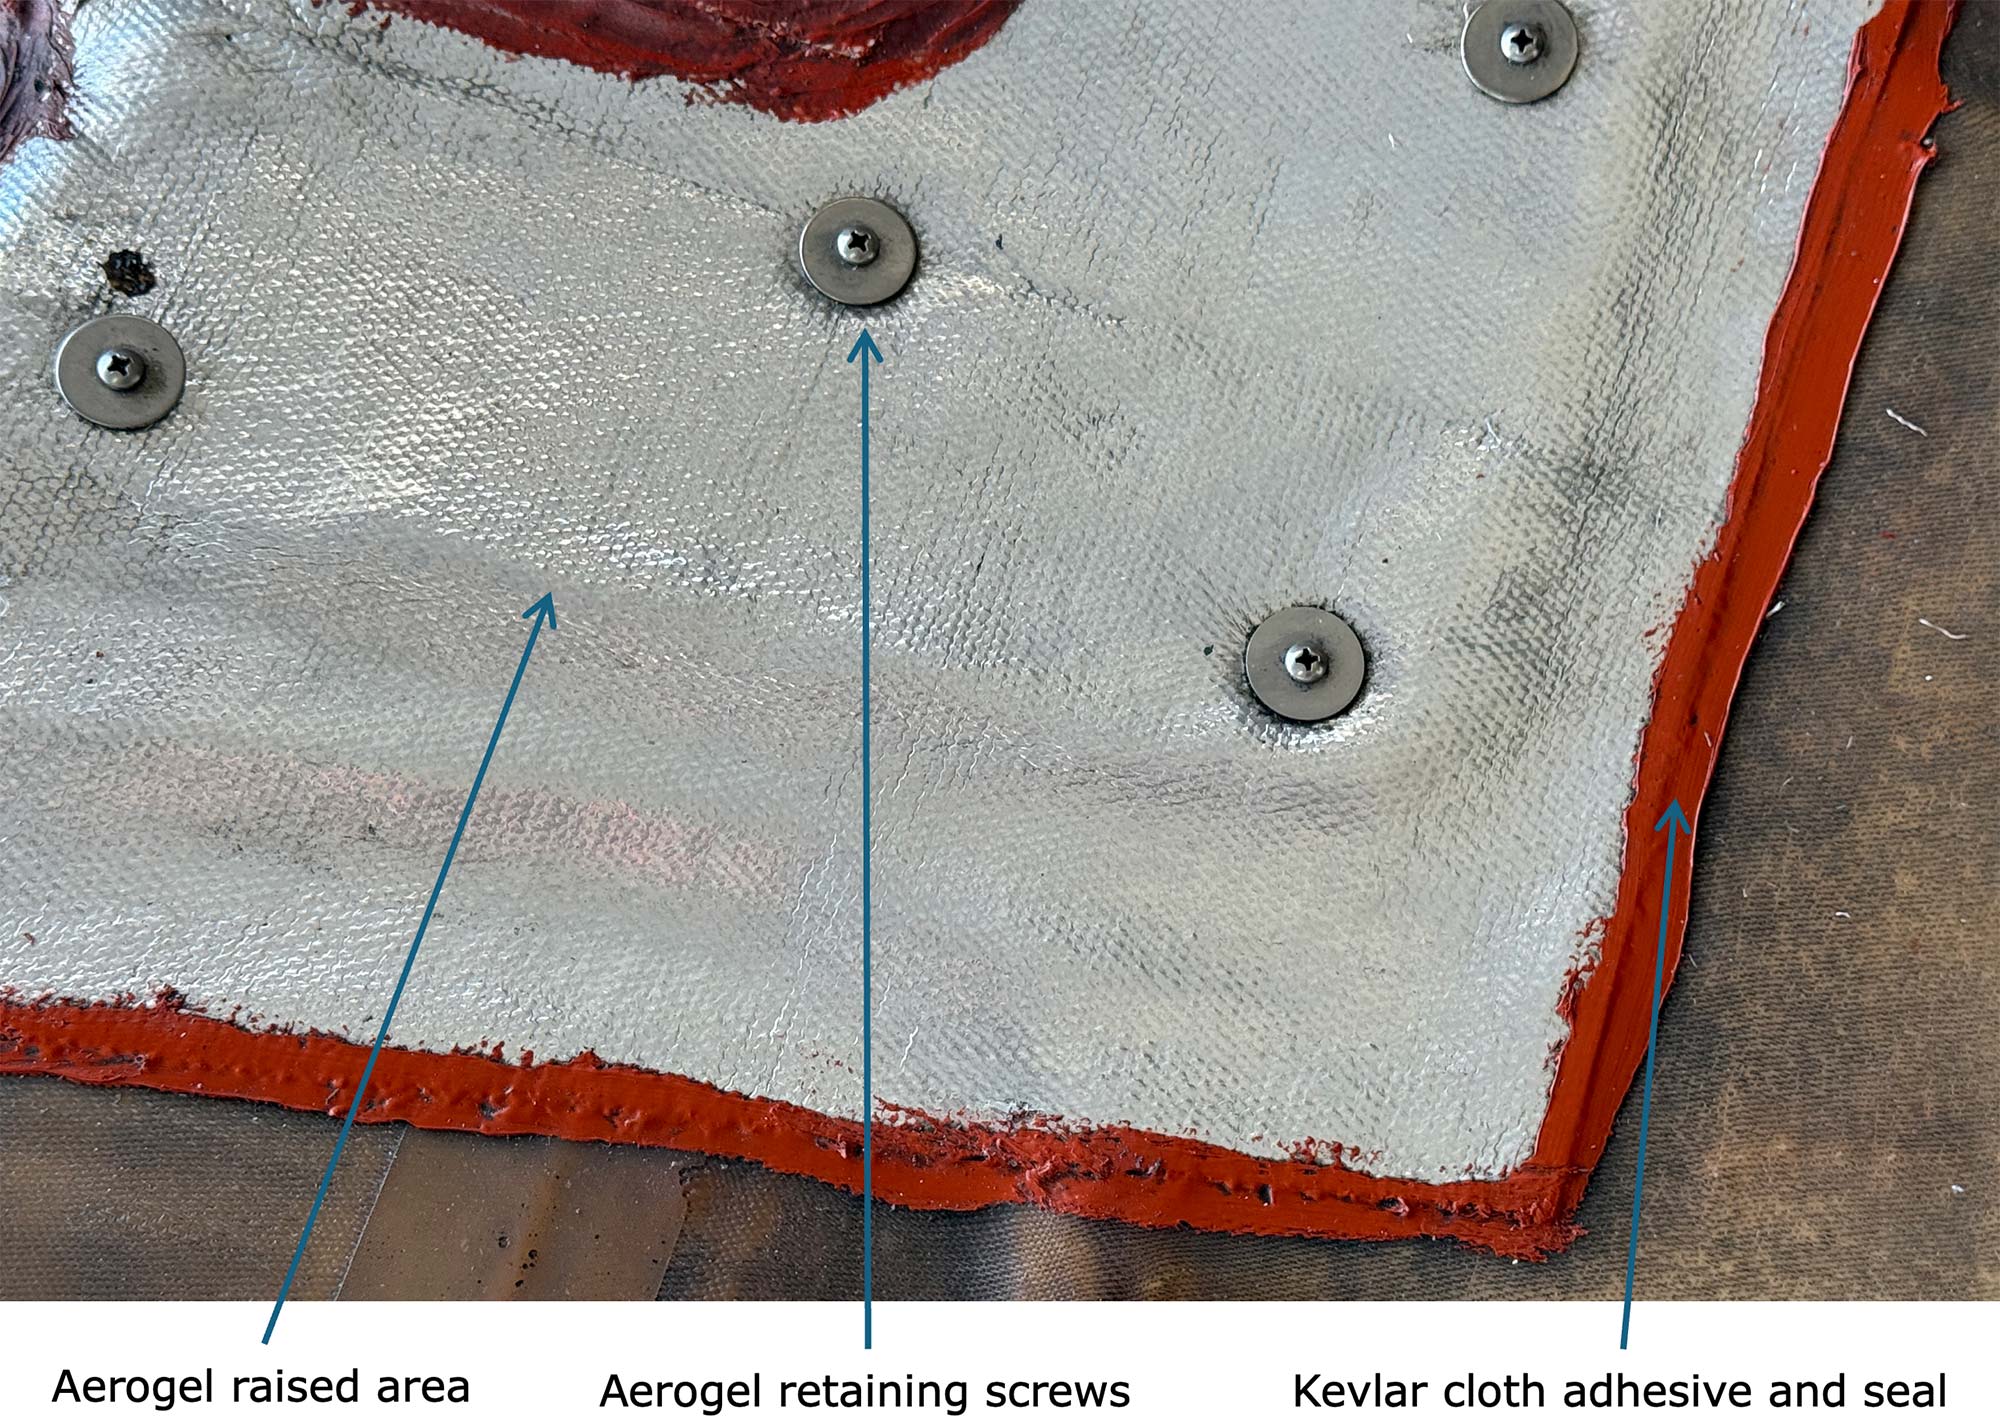
The challenge is how to attach the aerogel to the cowl. An aerogel mat has a powdery surface texture and feel due to the fine particulate nature of the microspheres, so it cannot simply be glued on. The exposed surface also requires a cover to address its porosity and contain the fine, powdery microspheres. I chose to apply a layer of aluminized Kevlar cloth from the auto racing world as a surface cover and containment method, using a few short screws and fender washers to hold the aerogel in place.
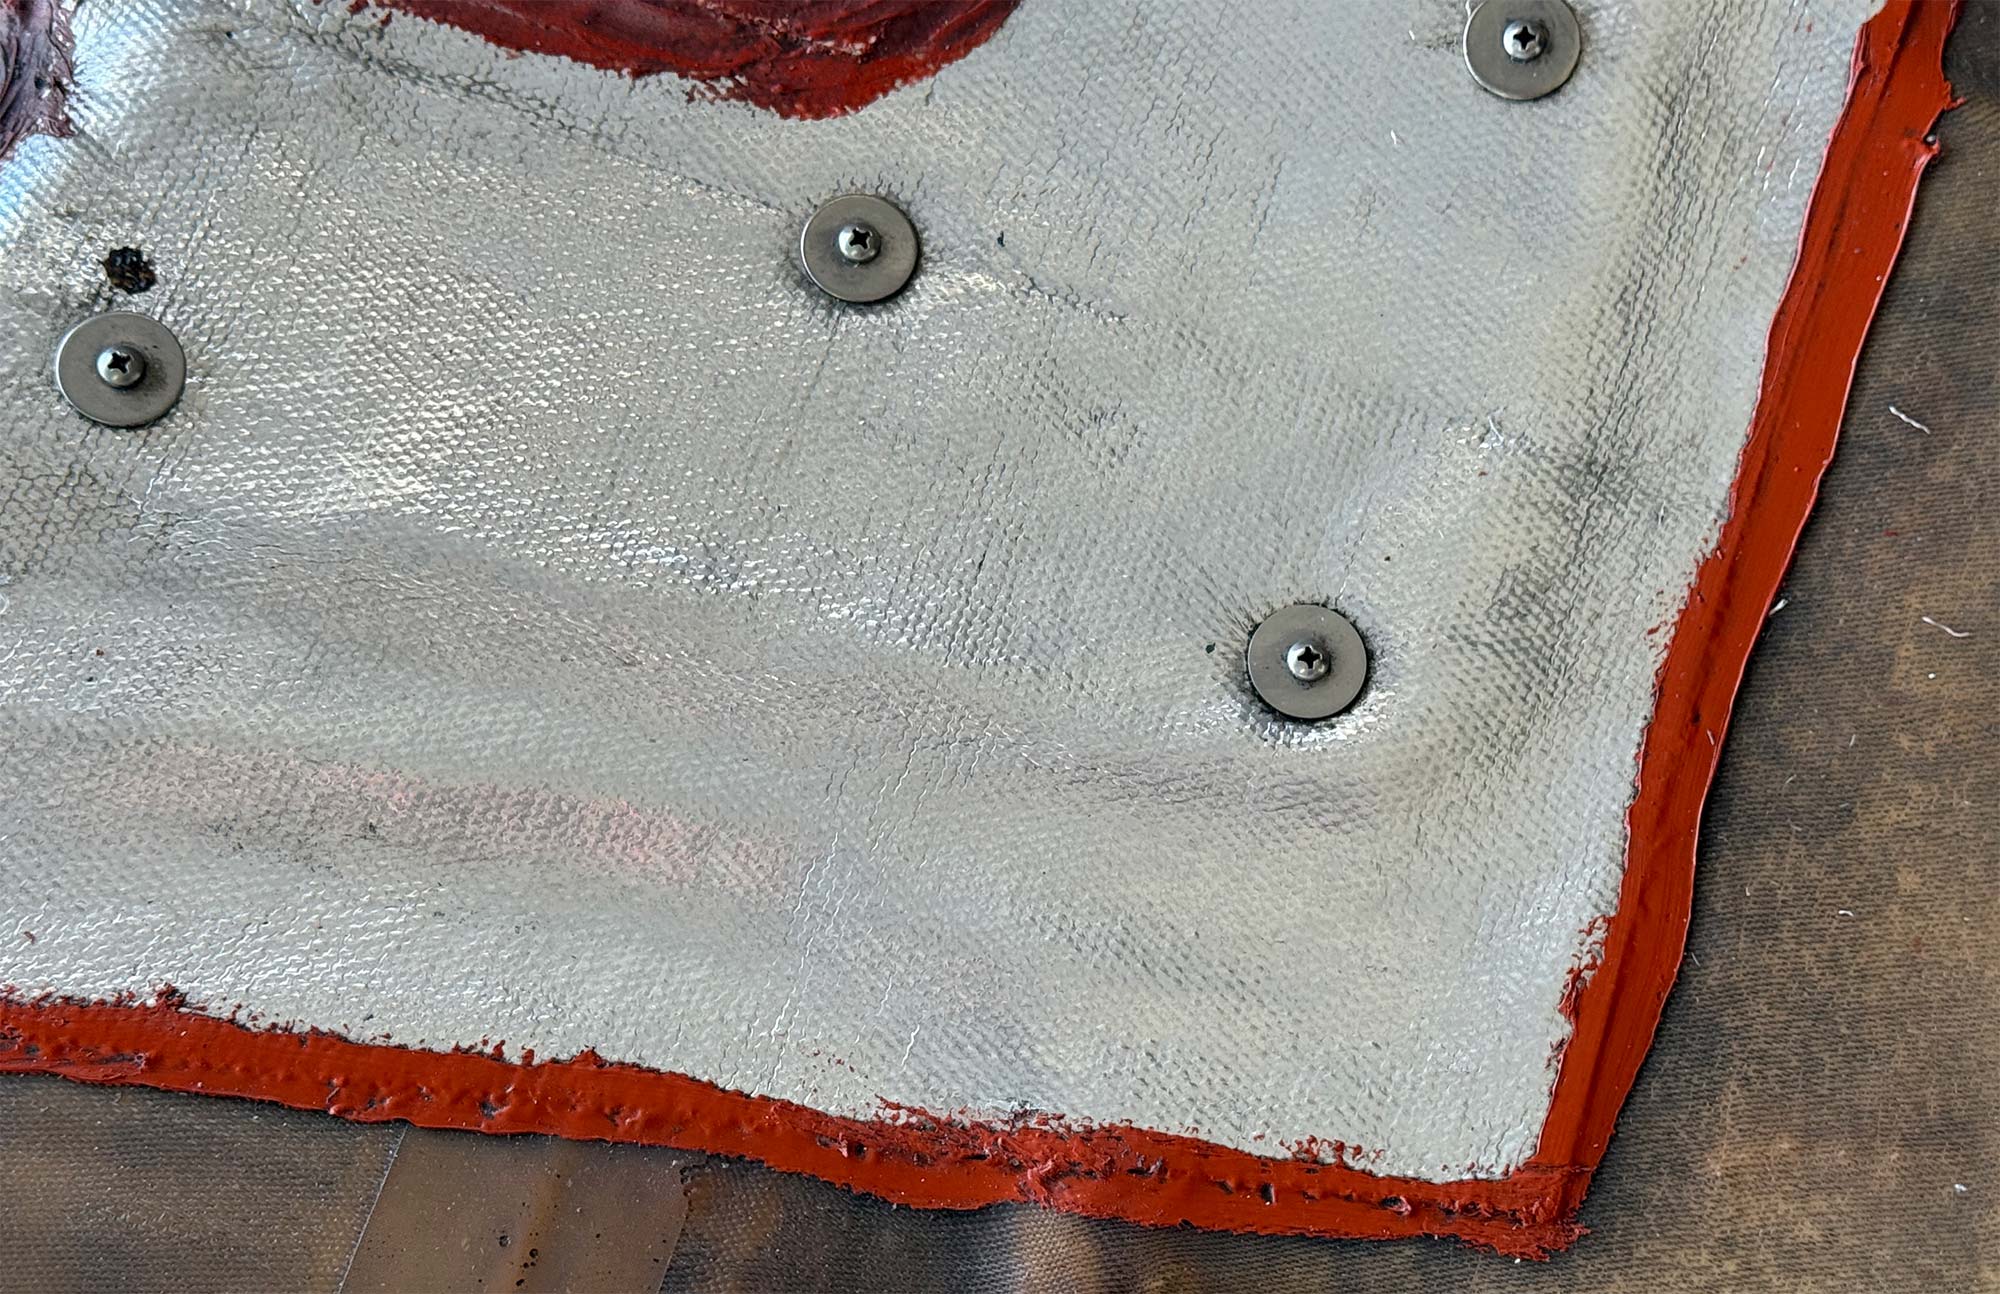
Figure 2 shows the aluminized Kevlar cloth I used, which is available on Amazon as well as from numerous racing suppliers. The Kevlar cloth is cut to extend beyond the aerogel mat pieces and is adhered to the cowl with red, high-temperature silicone rubber, including at the edges. With a fiberglass cowl, this requires a glass-core-glass structure to provide grip and depth for the fasteners (short wood screws), though most glass cowls are constructed this way. If not, an alternative is to add a few short Click Bond bosses or studs for attachment.

Figure 3 shows the two segments of the exhaust that get close to the cowl (and yes, since a four-cylinder engine shakes like a wet dog on shutdown, there have been occasional contacts with the insulation!). Figure 4 shows the final product: the aerogel mat and aluminized Kevlar cloth sandwich applied in two places in the lower cowl. Note the thicker areas where the 4 mm aerogel is under the cloth, which was placed only where maximum insulation is needed. Note also the dirty appearance—as noted, this was installed many years ago, and it did not seem prudent to tear it apart and redo it just for appearances!
Finally, note that handling the aerogel mat material requires some care. First, contact with the microspheres produces an ultra-fine dust. Therefore, handling it with disposable rubber gloves is highly recommended. Care should be taken to minimize agitation and the emission of microspheres into the air. Cut pieces to size with a sharp utility knife and wear a dust mask during all handling.

This is a perfect problem solving technical article, nicely done.
An excellent idea!
I used to own a Stemme motor glider which had a Rotax turbocharged engine mounted internally aft of the wing trailing edge. A maintenance requirement was that the inside of the cowling be painted with intumescent paint , a fire retardant coating which expands with high temperature. As a certificated aircraft, that was the required heat solution.
Does anyone manufacture high temperature silicon rubber surface coated aerogel that can be glued into place?
I would think that cliq bonding fasteners to the cowl preferable to causing stress concentrators by screwing into it.
I agree Barry.
With every climb to altitude, the trapped air expands. Is that air externally vented and if so, how do you prevent the aerogel dust from escaping? If not, how do you prevent the inner layer from growing into the exhaust pipe?
Turns out there is no expansion. I’ve had this in the plane for over 20 years with no problem. In any case the cover layer of aluminized Kevlar provides containment, and the Aerogel itself is in a fiberglass mesh as well.
Making a cowl with a 350F Tg solves the problem without adding weight.
Yes, I have done that.